The most important part when you encounter a problematic issue with a
PC running Windows 8/8.1 is to boot the PC into safe mode. On older
Windows versions this was done just by pressing the F8 key, however in
Windows 8 the Automatic Repair mode was implemented. Still, there are
users (like me) who want to boot into Safe Mode even in Windows 8. How
can we achieve that?
It seems that Microsoft has burried this option deep into the recovery option of Windows 8. Pressing the F8 during Windows boot, will boot your computer into automatic recovery mode, but you can still have the recovery options pressing the Shift+F8 key combination.

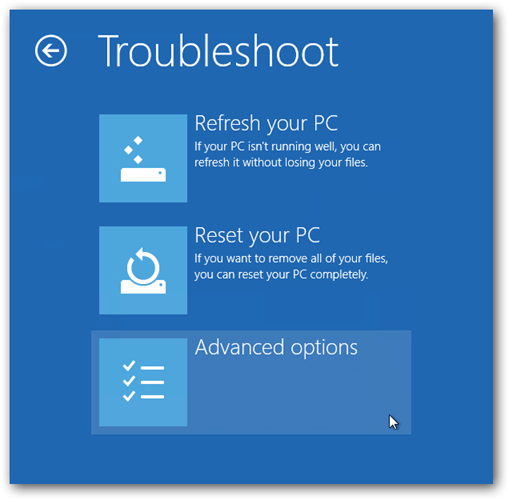
From this window, press the Troubleshoot button.

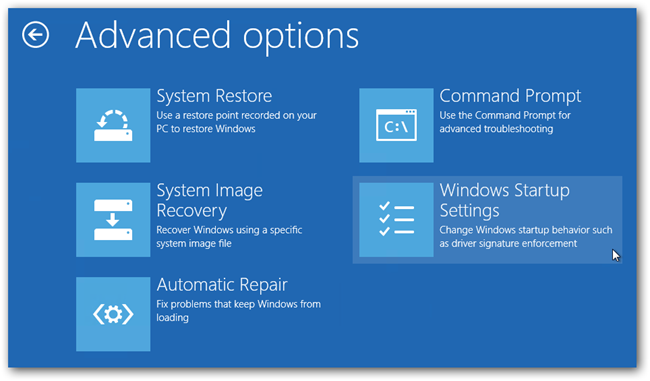
From this panel, select Advanced Options

Now, you press the Windows Startup Settings, you have to admit that this option is well hidden

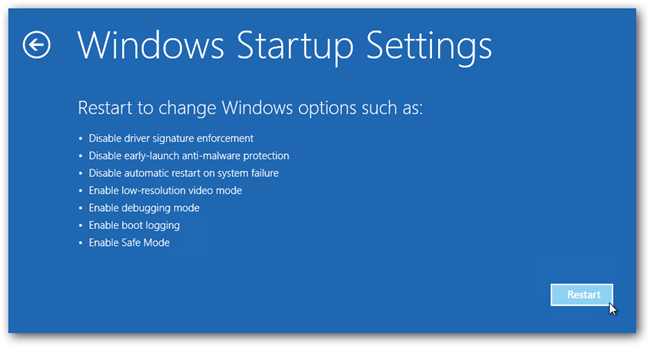
All you have to do now, is to press the Restart button.

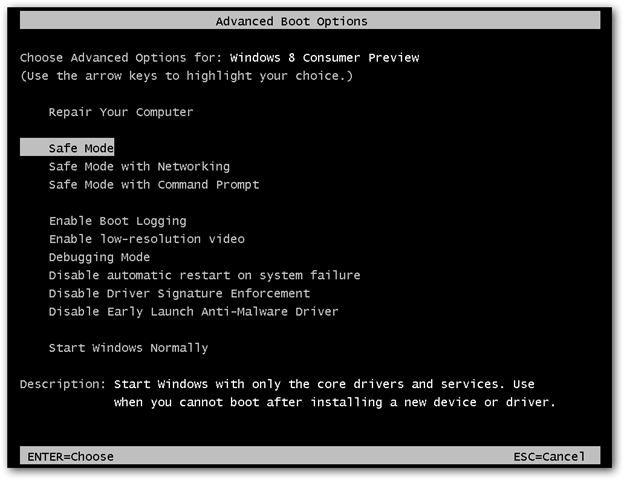
Well, on the next boot, you will get the well known Safe Mode boot option screen with the familiar looking.

There is an alternative method but this one requires you to be booted in Windows 8. Here you have to press the WIN+R key. When the Run box appear, type msconfig and press enter.

Go to the boot tab and be sure to have the Safe Boot check box selected.

You have multiple options. You can choose to have the Safe Mode boot into the following:
If you restart your PC, it will just boot into Safe Mode until you stop this boot sequence. To do this, open one more time msconfig and uncheck the Safe Boot option. After that press the OK button and finally restart your machine.
It seems that Microsoft has burried this option deep into the recovery option of Windows 8. Pressing the F8 during Windows boot, will boot your computer into automatic recovery mode, but you can still have the recovery options pressing the Shift+F8 key combination.
Boot Windows 8 into Safe Mode.
Well, here is the tricky part, holding the Shift button and mash the well known key F8, this will bring up the newly implemented “Recovery Mode”, where you can see the advanced repair tools and options.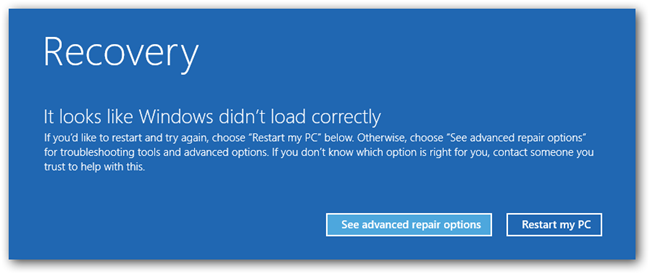
From this window, press the Troubleshoot button.

From this panel, select Advanced Options
Now, you press the Windows Startup Settings, you have to admit that this option is well hidden
All you have to do now, is to press the Restart button.
Well, on the next boot, you will get the well known Safe Mode boot option screen with the familiar looking.
Booting to Safe Mode from the Windows 8 desktop.
There is an alternative method but this one requires you to be booted in Windows 8. Here you have to press the WIN+R key. When the Run box appear, type msconfig and press enter.

Go to the boot tab and be sure to have the Safe Boot check box selected.

You have multiple options. You can choose to have the Safe Mode boot into the following:
- Minimal – this is a normal safe mode
- Alternate Shell – just a normal safe mode with a command prompt flavor
- Network – safe mode with networking support.
If you restart your PC, it will just boot into Safe Mode until you stop this boot sequence. To do this, open one more time msconfig and uncheck the Safe Boot option. After that press the OK button and finally restart your machine.